Contact flows
Changing your Contact flows
A contact flow defines the customer experience with your contact centre from start to finish. Amazon Connect supports multiple contact flow types as detailed below.
Contact flow types
| Type | When to use |
|---|---|
| Inboundcontact flow | Flow that is attached to a phone number so is reached first on an inbound call from a customer. This enables you to control the customer flow using voice prompts and allowing customers to indicate why they are calling. |
| Customer queue flow | Manages what the customer experiences while in queue, before being joined to an agent. Used for music, comfort messaging, requesting callbacks. |
| Customer hold flow | Manages what the customer experiences whilst on hold. With this flow, one or more audio prompts can be played to a customer. |
| Customer whisper flow | Is activated immediately before an inbound customer is joined to an agent. |
| Outbound whisper flow | On an outbound call, the customer is placed through this flow immediately before being connected to the agent who placed the call. |
| Agent hold flow | Manages the agent experience immediately before being connected to a customer. |
| Transfer to agent flow | Manages what the agent experiences immediately before being transferred to an agent via a quick connect. |
| Transfer to queue flow | Manages what the agent experiences immediately before being transferred to a queue via a quick connect. |
Contact block definitions
You create contact flows in the contact flow designer using contact blocks. Drag and drop contact blocks onto a canvas to arrange a contact flow and control the logic.
Please refer to the contact block definitions documentation for a complete list of supported functionality.
Listing contact flows
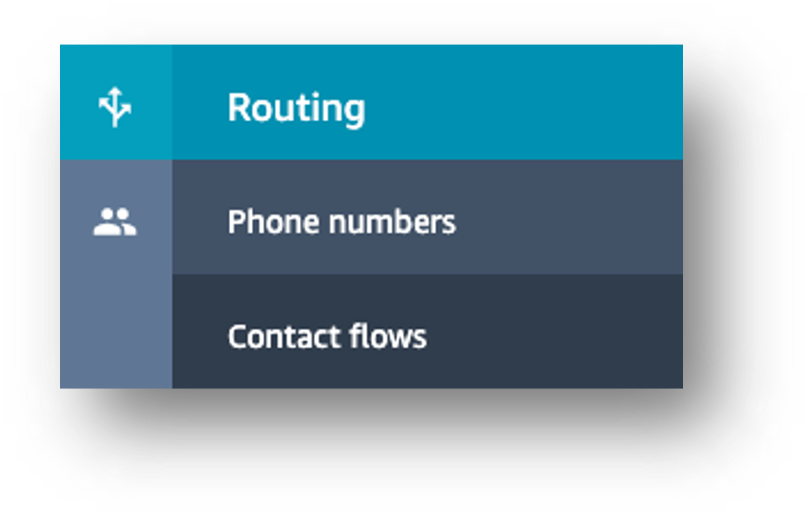
To view contact flows in Amazon Connect, select Routing from the side menu then Contact flows.
A list of contacts flows is displayed along with a brief description and its type. All the live contact flows are prefixed as per our naming conventions. A selection of sample flows is listed along with some flows used for training.
From here you can create a new contact flow or select a contact flow to edit.
Editing contact flows
Adding a check for hours of operation
Click on the Training inbound flow in the list to open the contact flow designer. The left of the page shows the name and description (click the Show additional flow information link to display and edit the description). Below that are groups of blocks that can be added to the flow. The right panel shows the configured flow and logic.
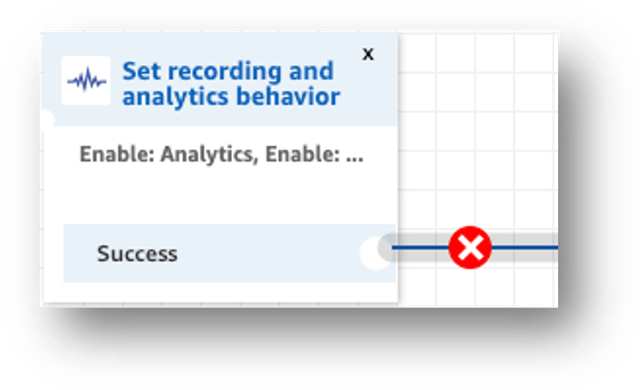
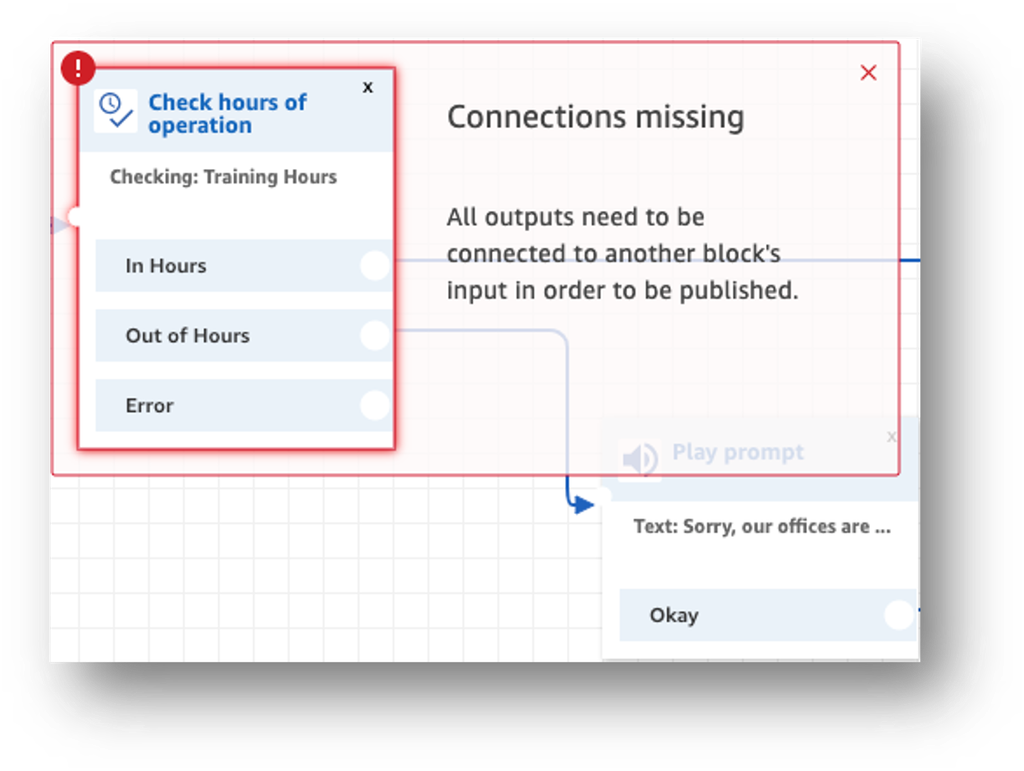
Hover over the connector between the Set recording and analytics behaviour block and the Get customer input block and you’ll see a red cross appear.
Click on the cross to delete the connector.
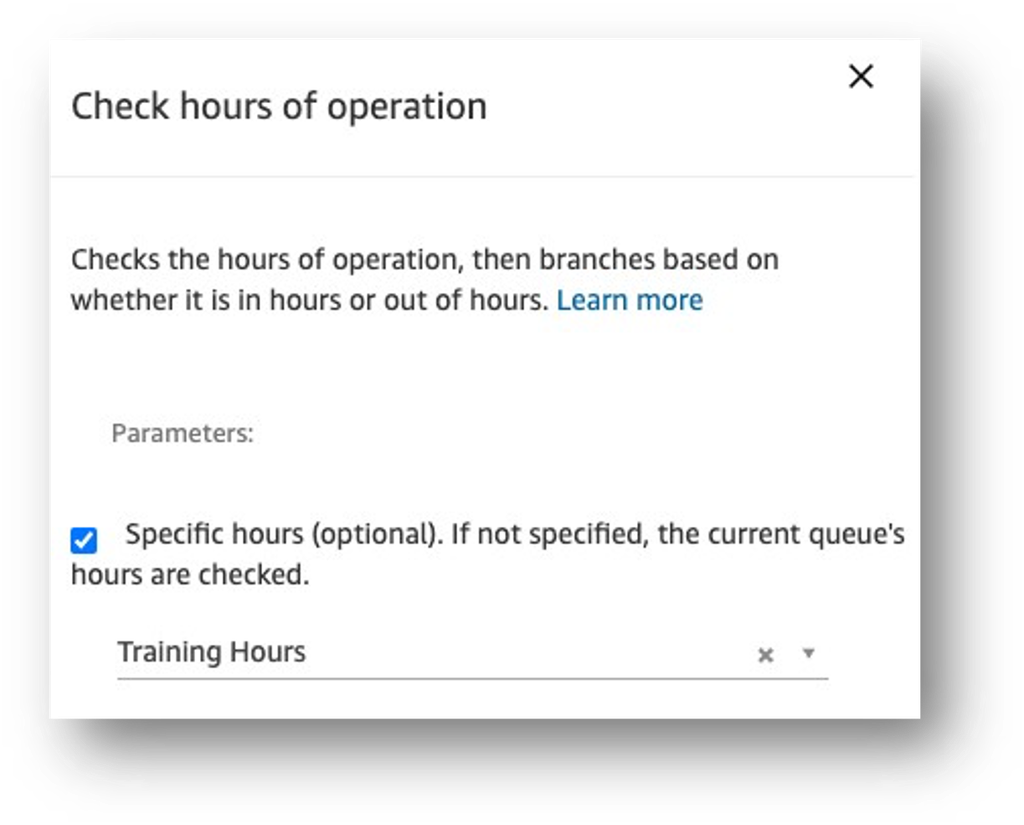
In the left menu, expand the Branch option, find the Check hours of operation block and drag the block onto the designer in the space.
Click the header of the block to open the options panel on the right
Click the Specific hours checkbox, select Training Hours from the list and then click Save.
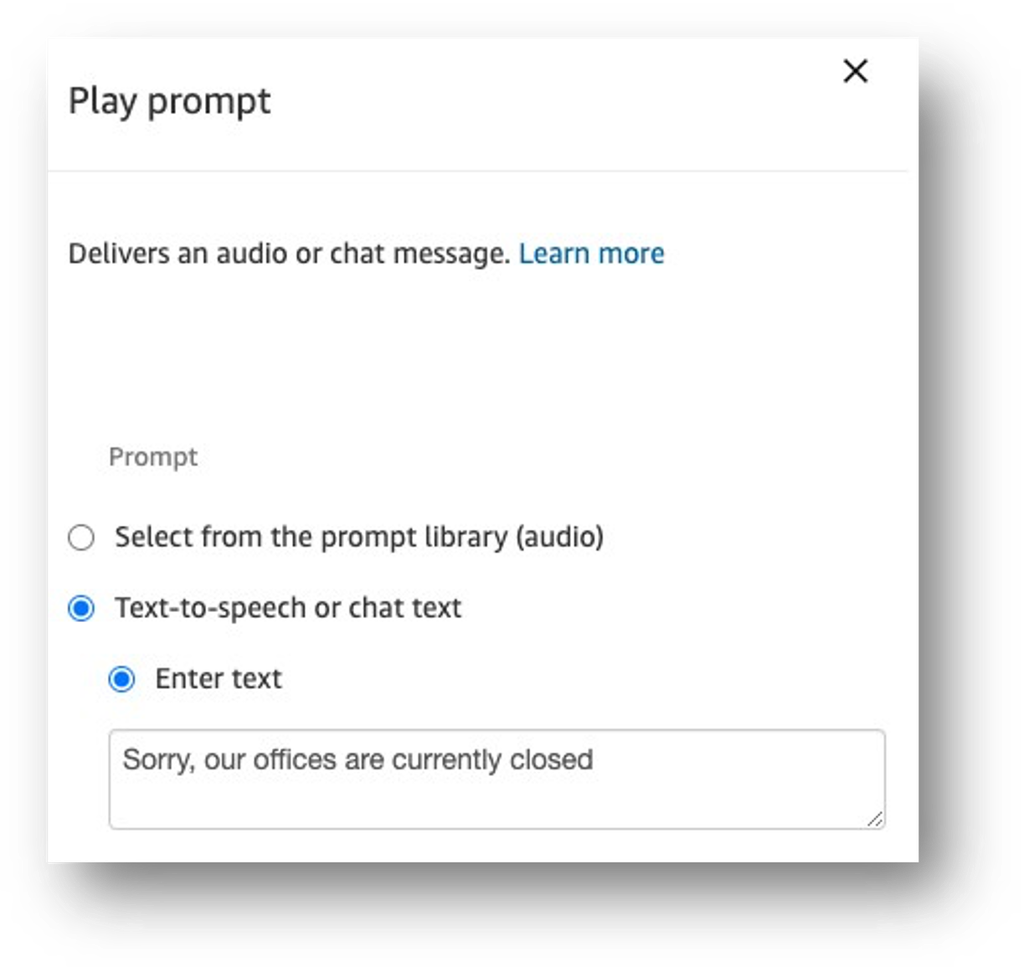
In the left menu, expand the Interact option, find the Play prompt block and drag the block onto the designer in the space.
Click on the header of the block to open the options panel on the right.
Select the Text-to-speech option, enter the text “Sorry, our offices are currently closed” and click Save.
Next, we need to connect up the new blocks. Hover over the white circle on the In Hours option of the first block you added. Click and drag the line across to the Get customer input block until the line connects.
Repeat for the 2 remaining options Out of Hours and Error by connecting to the Disconnect block.
When you’re finished editing the flow, click the dropdown to the right of the Save button and select Save & publish.
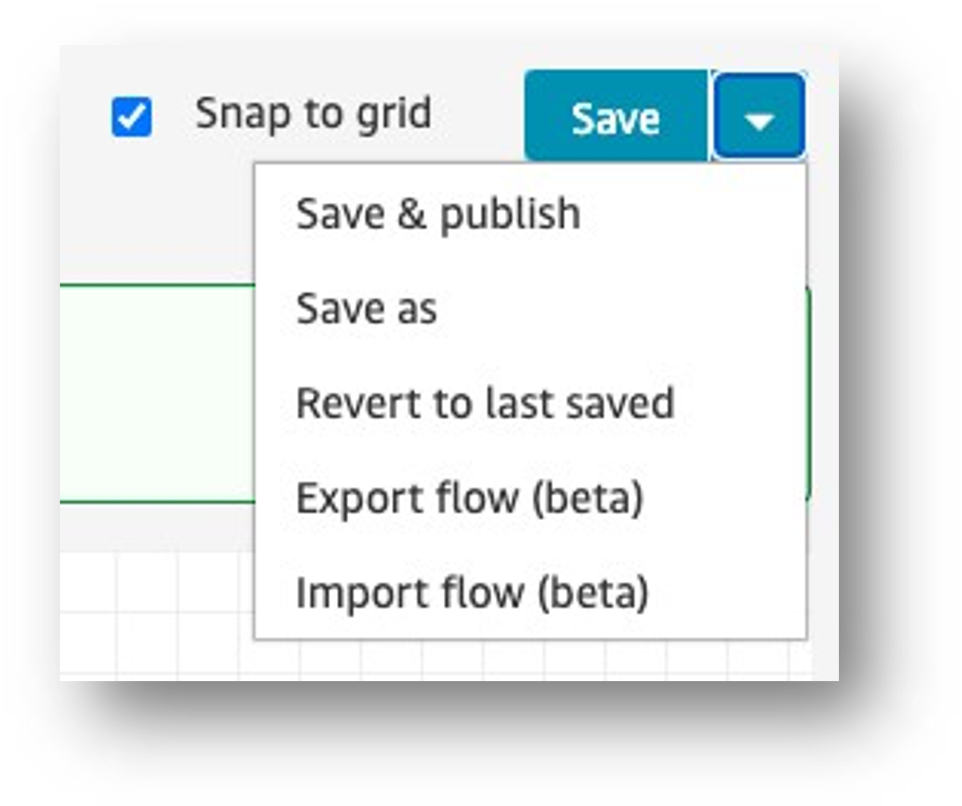
If there are any errors in the flow, then these will be highlighted to you. Click on the error icon to display details and fix the issues before trying the re-publish.
Adding an additional IVR option
Click on the Training inbound flow in the list to open the contact flow designer.
Scroll to the right to display the Get customer input block and click on the header to display the options panel.
Scroll to the bottom of the options panel and click Add another condition.
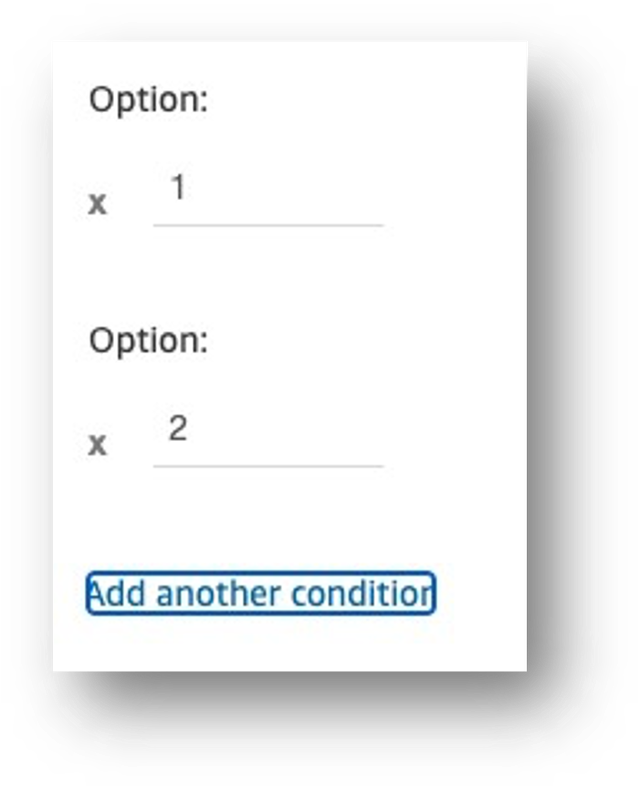
Enter the number 3 and click Save.
From the left panel, expand the Set section and click and drag the Set contact attributes to the designer.
Click on the header and in the panel enter a Destination Attribute of sa-tag-name and a Value of Training option.
Finally, attach the connectors and click Save & publish.
Updating music for queueing customers
Click on the Training customer queue flow in the list to open the contact flow designer.
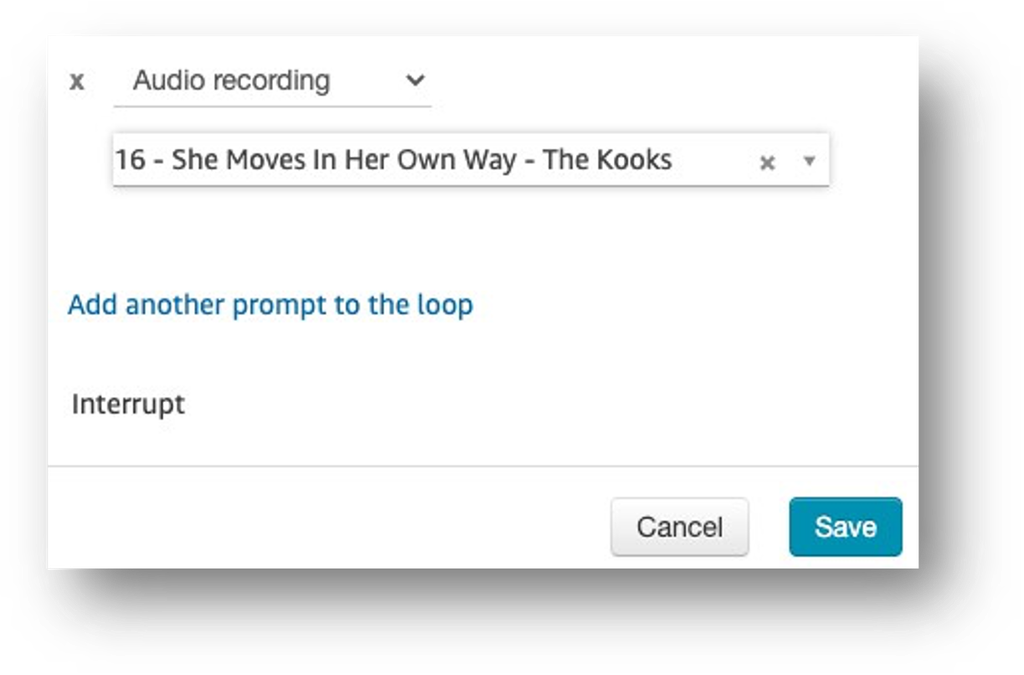
Click the header on the Loop prompts block to display the options panel.
Scroll to the bottom of the panel and click the Add another prompt to the loop link.
Leave the Audio recording default vale and then click to search for a prompt.
Type 16 to locate the new track to add - please note that the search is based on the start of the prompt name. Typing kooks would not return any results.
Click the prompt name to select it and then click Save.
Finally, click Save & publish.