Agent Routing Profiles & Hierarchy
Adding or Amending Routing Profiles
While queues are a ‘waiting area’ for contacts, a routing profile links queues to agents. When you create a routing profile, you specify which queues will be in it. You can also specify whether one queue should be prioritised over another.
Each agent is assigned to a single routing profile.
A routing profile can have multiple agents assigned to it.
Listing routing profiles
- To view routing profiles, select Users from the side menu then Routing profiles.
- A list of routing profiles is displayed along with a count of queues and agents assigned to each one.

Creating new routing profiles
To create a new profile, click the Add new profile button.
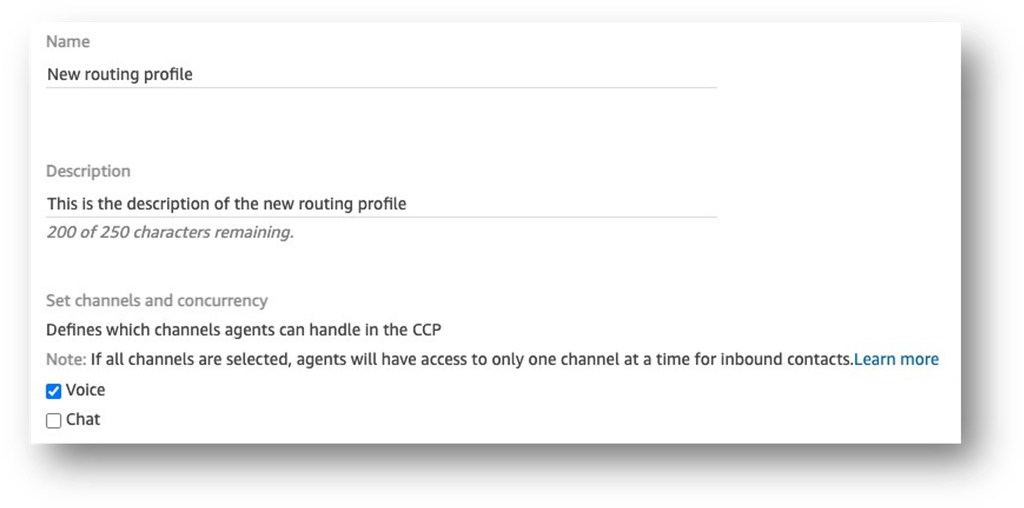
Enter a name and description for the profile. The name will be visible to supervisors when assigning the profile to agents.
Select the channels the profiles will support. In your case this will be only voice.
Next assign some queues to the routing profile. A blank row will already be visible. Once you’ve added the first queue, click the Add queue button to add more
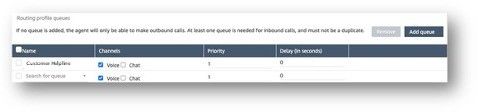
Select a channel for each queue - in your case, voice will be preselected.
Then select a priority and delay based on your requirements.
Make sure that you select a queue for any outbound calls made by the agents on this routing profile. Select Outbound from the list.
Finally, click on Add new profile and your routing profile will immediate be available to assign to users.
Editing routing profiles
- The process for editing routing profiles is the same as adding a new one.
- If you need to remove queues, simply check the box next to the queue and click the
Remove button. If a profile is no longer required, you can remove all queues and click Save.
Understanding queue priority and delay
Priority and delay are powerful features that allow you to load balance contacts among groups of agents.
Please refer to this documentation for details of queue priority and delay and queue-based routing.
For example, one group of agents is assigned to a Sales routing profile. Since their primary job is handling Sales contacts, the Sales Line queue is Priority 1 and Delay is 0. As they can also help with Service contacts, so the Service queues can be set with a priority of 2 and a delay of 0.
| Queue | Priority | Delay (in seconds) |
|---|---|---|
| Sales Line | 1 | 0 |
| Service Complaints Queue | 2 | 0 |
| Service Transfer Queue | 2 | 0 |
| Service Other | 2 | 0 |
If there are no contacts in the Sales Line queue, then the agents will be presented with contacts from the Service queues with the same priority as each other.
Say you set the Service queues to Priority 1 and Delay of 30 seconds, as shown in the following table:
| Queue | Priority | Delay (in seconds) |
|---|---|---|
| Sales Line | 1 | 0 |
| Service Complaints Queue | 1 | 30 |
| Service Transfer Queue | 1 | 30 |
| Service Other | 1 | 30 |
These agents will always get contacts from the Sales Line queue first because the delay is 0. However, when a contact in the Service queues ages past 30 seconds, it will also be treated as priority 1. The agents will then be presented with the contact from the service queues.
In this example a routing profile has all queues, and they have the same priority and delay:
| Queue | Priority | Delay (in seconds) |
|---|---|---|
| Sales Line | 1 | 0 |
| Service Complaints Queue | 1 | 0 |
| Service Transfer Queue | 1 | 0 |
| Service Other | 1 | 0 |
For this routing profile, the oldest contact is routed first. It goes to the agent who has been idle for the longest time.
Amending Agent Hierarchy - adding new teams / departments
Agent Hierarchy is designed to help you report on performance for particular teams and can also be used to restrict access to call records to those within a particular part of an organisation. You can create different levels of agent Hierarchy and name that to whatever is appropriate for your organisation. It’s easy to add new departments or teams within this agent Hierarchy structure.
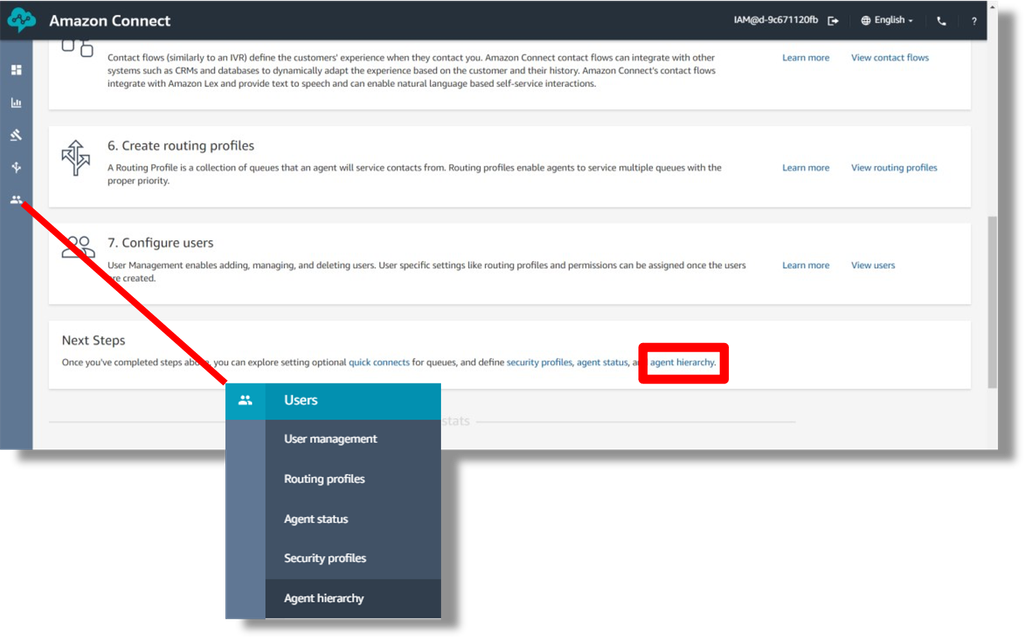
Agent Hierarchy is accessed through the dashboard or from the User Management menu
Typically you will want to rename teams, add new teams or new departments within your existing structures and this is really easy to do.
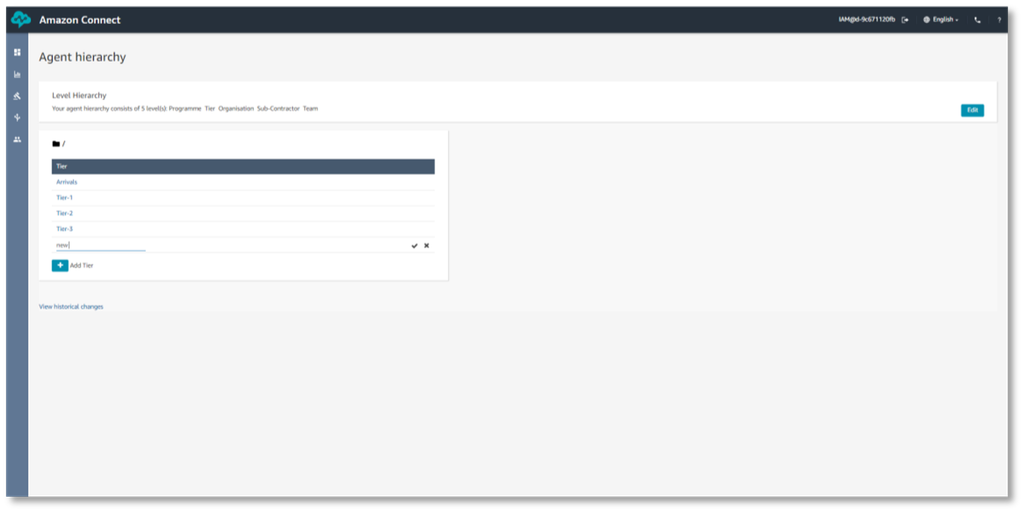
In this example the organisation has 5 levels, SLT Lead, Division, Site, Department and Team. At Division Level they currently have 4 specified, Customer Engagement, Support Services, Sales & Marketing and Logistics.
If they want to set up a new Division, they need to move to the correct level of the hierarchy and then click the “Add Tier” button and then create a name for the new Division.
If they recruited a new team leader and wanted to add a new “team” within the direct sales department at their Manchester site, they would need to click down the Hierarchy – SLT Lead > (Sales Director) > Division (Sales & Marketing) > Site (Manchester) > Department (Direct Sales) > and then click the “add tier” button to add the new team leaders name to the list of team leaders already within that level.
Once this is done, any agents that the new Team leader is responsible for can have their agent hierarchy amended so their stats and call records can be viewed by the new team leader.
If however the new team leader was taking over an existing team from a leader that has left, you may prefer to follow the process outlined in the next section to edit an existing Agent Hierarchy item.
Amending Agent Hierarchy - Renaming or Re-structuring the Hierarchy
You may need to just change the name of a Department or Team Leader without changing any of the reporting that surrounds it or if you only currently use 2 of the 5 levels of Hierarchy available and need to add a level, or are looking at more of a major restructure then you may need to rename or add whole new tiers to your structure.
In order to do this you need to access the Agent Hierarchy screen and click on the “Edit” button in the top right hand corner to access the Agent Hierarchy edit screen.
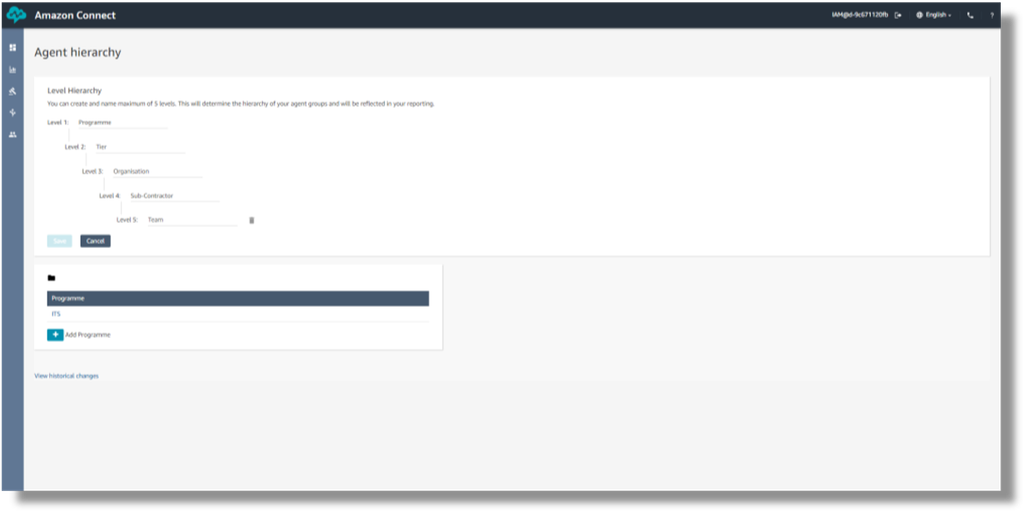
In the upper part of the screen you can rename the Agent Hierarchy labels or add a new Level altogether if needed. You can also delete a level if it is no longer required, but you can’t delete a level until you have deleted or deactivated any levels that sit below that level.
In the lower part of the screen you can select the submenu item and click the pen icon to amend the details or the bin icon to delete / deactivate it.
So, if you wanted “Direct Channels” to be renamed as “Direct Services” you could do that without disrupting the setup or historic data. You would just need to make people aware of the change and that the “new” name might also appear in any historic reports generated after that date. You can view any of the historic changes from this screen also to help track any changes in reporting names.