ACW Contact log settings
Enabling this function
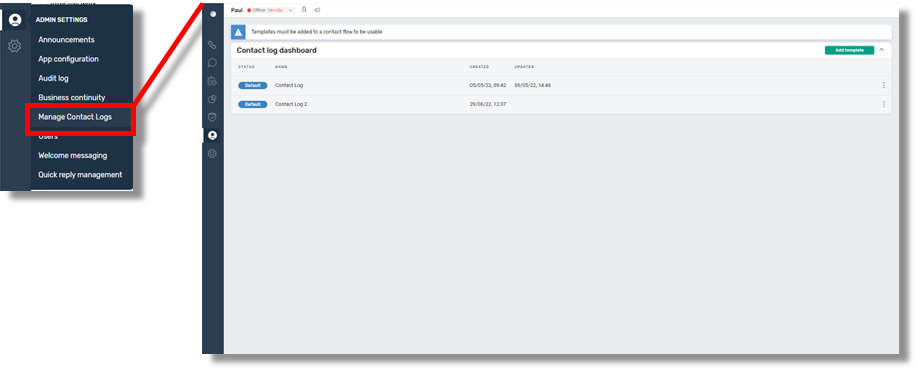
This feature can be enabled by adding in the “Manage Contact Logs” permission in “Permissions” for the relevant security profiles. This will be added automatically to Admin security profiles. Check out more on "Switching on" new Standard Features in Permissions
Within the admin settings menu you can access the contact log dashboard which shows any current contact log configurations built for your system and their status. Any contact logs marked as “default” status will be the one that any contact will revert to if a contact log configuration is not specified in the Contact flow.
From this screen you can edit or delete any contact log configuration by selecting the three dots next to the specified configuration and also create a new template by selecting the Add template button.
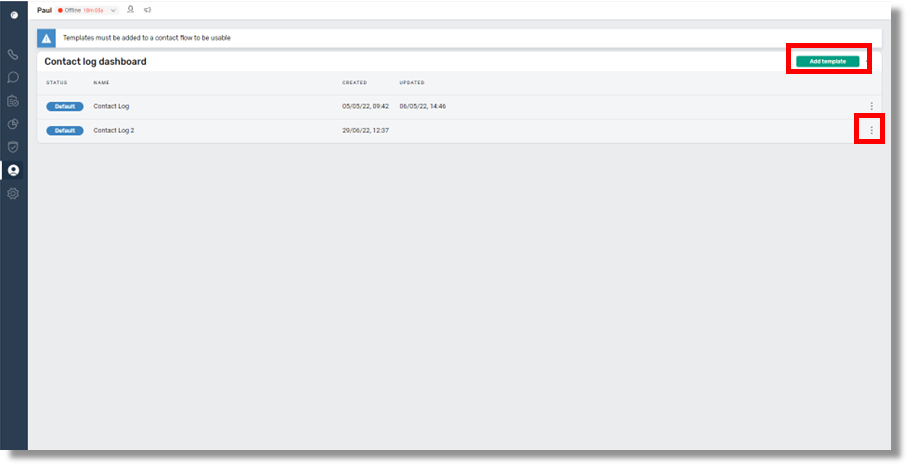
If you select the “edit” option then the Edit template screen will appear as shown below.

This will contain all the existing elements within the contact log and will allow you to make any necessary changes.
- Template Name / ID number:
You should bear in mind that any changes made to this may affect how the Contact log appears to agents as this will have been configured within Amazon Connect contact flows, so it may be useful to test this within a UAT environment before making changes in a live environment. We would also recommend using an agreed naming convention to make it clear what each configuration is used for. - Set as Default:
The default Contact Log will be the one that any new contact flow created will use, unless a specific contact log configuration has been specified.
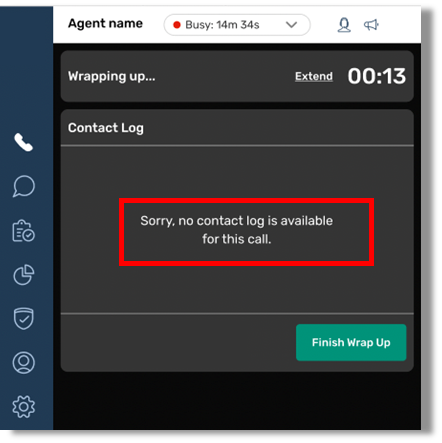
If however it has previously had a specified / named contact log configuration that is somehow broken, eg by amending the name or ID number, then an error message will appear to agents as below..
Wrap time Limit / Allow time extension
Within the contact log configuration you can set specific options for Wrap time limit / allowing agents to extend the time. These settings can be independent of the settings on the overall App configuration settings if this configuration is applied to a particular contact flow – eg giving a complaints handling team longer to complete ACW because of the nature of the calls they receive.
Adding or editing a section of the contact log screen
Let’s say a company initially just wanted a simple Query resolved Yes / No option to appear. An example of that is below, and how that might look to an Agent. However, if the company setup an escalation process to a specialist team, they might want to be able to track this, so would want to maybe amend the contact log screen.
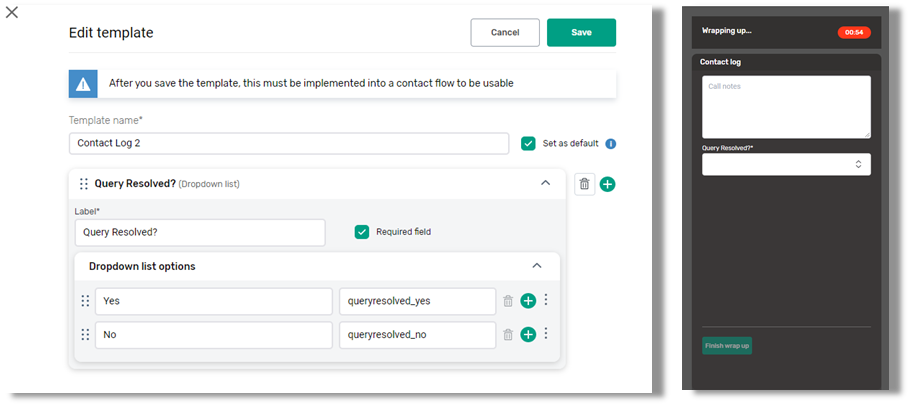
So they could select the green “Plus” symbol to create an additional option for the Agent to input. This would then need a new Label option – namely what the Agent would see and a “Data Label” field. This field would appear in the CTR record and then be reportable / extractable for reporting purposes.
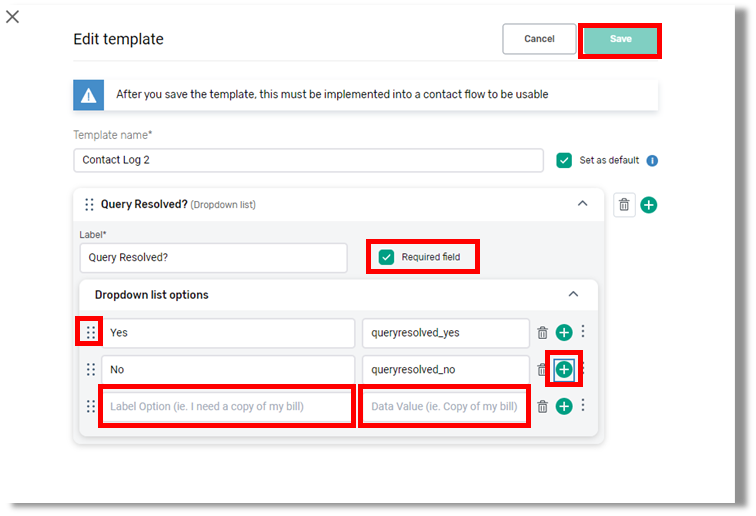
The order in which these are presented can be amended by dragging and dropping the option using the six dots at the side of the option.
You can also specify if these question is a required field – namely the Agent has to complete it before being allowed to finish ACW.
So the person would input these details and hit “Save” to complete these amendments. If however, they wanted to add a whole new section they can select the green plus next to the Field label title.
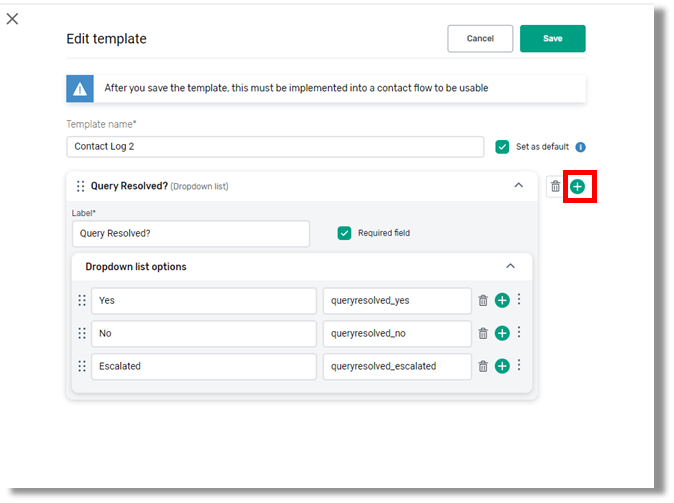
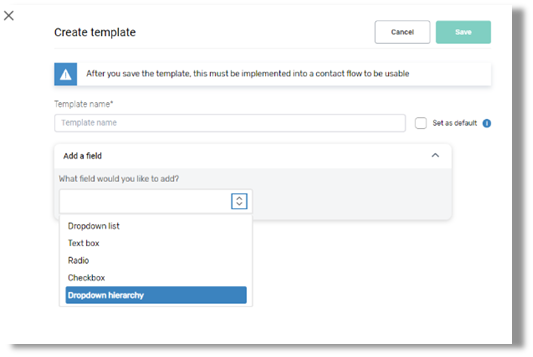
This will then present them with a dropdown menu to select the type of additional field to add.

A “Dropdown List” will allow Agents to select an option from a defined list, just as the above list appears with full data labels.
- A “text box” will allow Agents to input free format text within the section.
- A “Radio button” will allow Agents to select one option from a list of radio buttons presented.
- A “checkbox option” will allow agents to select multiple options from a list of checkbox options.
A “Dropdown Hierarchy” will allow agents to select a data label from a Hierarchy of options that can be configured, particularly suited to larger and complex organisations. We will cover this in detail in a later section.
- “Date Picker” – this will create a dropdown calendar option with a text box to enter details for the calender such as “Date of next appointment”
- “Time Picker” – this will create a dropdown time option with a text box to enter details for the time such as “Time of next appointment”
We will show some examples of different options and what an Agent would see if configured in that way.
Example Contact Log Settings
In this example the company wanted the Agents to also confirm how the transfer was handled, for example whether this was a “warm handover” where they introduce the customer to the escalation team, or if they just transferred them to the queue for the escalation team.
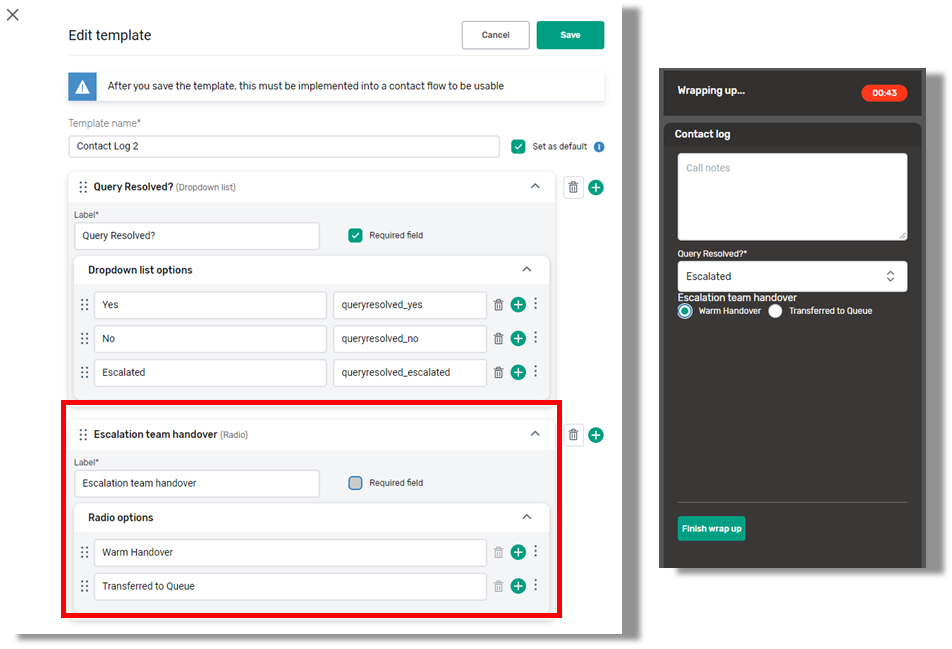
As this option might not occur every time, we didn’t make this a “required field”
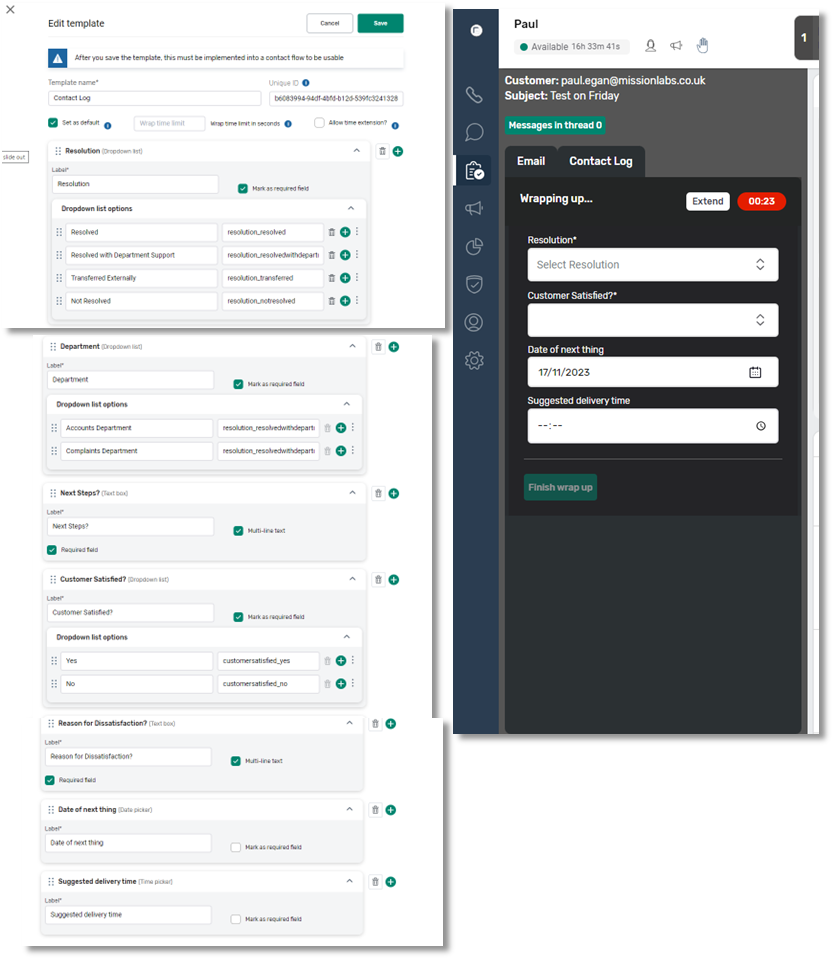
Let’s say a company want to create a dropdown list option with a Calendar Picker and a Time picker to appear to appear.
An example of that is below, and how that might look to an Agent. However if the company setup an escalation process to a specialist team, they might want to be able to track this, so would want to maybe add more to the contact log screen.
Let’s say a company want to create a dropdown list option with a hierarchy of answers then they would use the Dropdown Hierarchy option.
This allows you to create a complex hierarchy of information based upon a hierarchy you create with upto 8 different levels of hierarchy and an upto 100 listed at each level of the hierarchy.
In this example we will use geographical regions, to illustrate, but this could be based on whatever hierarchical structures suit your organisation. To start, we would need to select the Dropdown Hierarchy option from the dropdown menu.
We then need to give this template a name and input the Label for this section and input the first level of the Hierarchy within the appropriate fields.
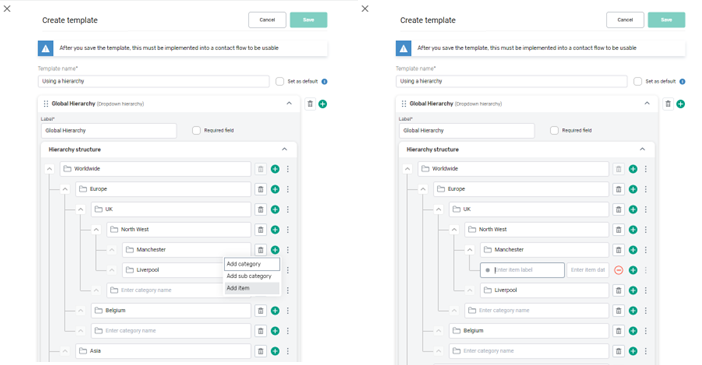
To add more to the Hierarchy we then select the green plus symbol next to the hierarchy structure.
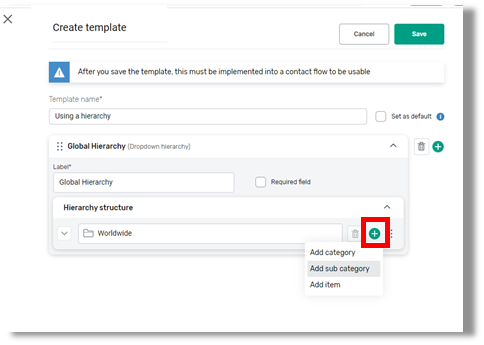
We will then be offered the option “Add category”. This will always add an additional structure at the same level as the one we have selected.
If we select the “Add sub category” this will create a sub category underneath the level we have selected.
If we select the “Add item” this will create an Item listing and data value field as a dropdown menu item Agents can select within that part of the hierarchy and that can be reported on.
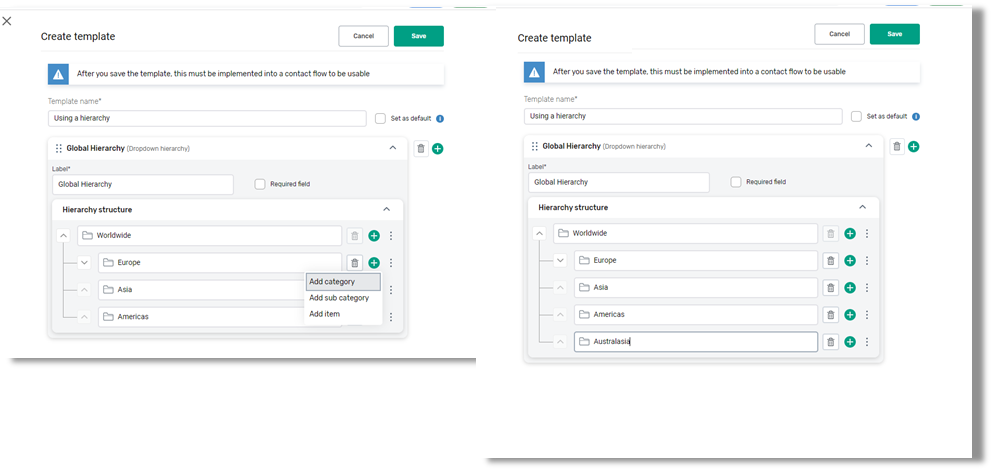
So in our example we can create a number of sub categories under the “Worldwide” level of Europe, Asia and Americas. We could then select the Plus symbol next to Europe to add another category and create a category of Australasia. We can use the three buttons at the side to move the order in which the categories are listed.
We can then create whatever sub categories we need for the organisation, and at each level we have the opportunity to create more categories at the same level, sub categories underneath, or Items as actual dropdown options for agents to select and have data values that can be recorded.
Each folder has it’s own unique address, so you can repeat common terms, so long as they are not duplicated at the same level.
So in our example, each category location could have it’s own sub category of “Delivery” as they would all have their own unique address e.g. Worldwide\Europe\UK\Northwest\Manchester\Delivery.
However the system will not allow you to create duplications at the same level.
So for example if you tried to create two “Manchester” categories at the same level the system will not allow this.
Creating the UK Within the “Europe” folder would be done like this…
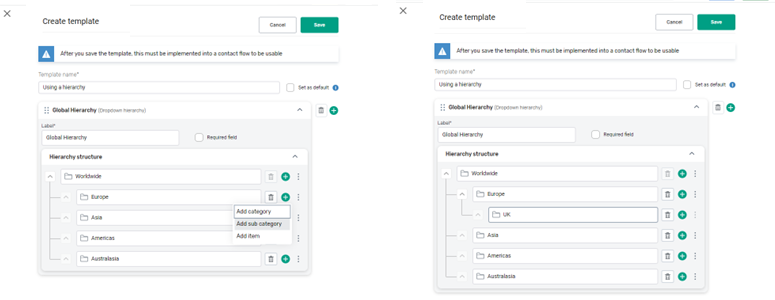
We could then create sub categories of regions and towns until we want to create dropdown items for a specific town location eg Manchester.
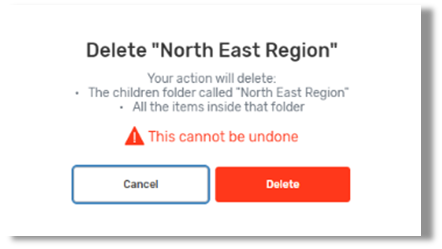
Deleting part of Hierarchy
If at any point you try and delete a category that has sub categories or items within those sub categories you will be warned that all items and sub categories under this item will also be deleted.
So you should ensure that items have been recreated in new homes / moved appropriately before deleting items from the hierarchy.
Linking a Contact Log template to a Contact flow in Amazon Connect
Once you have completed a contact log template in SmartAgent, if you want it to apply to a particular Contact flow you will need to make a note of the Contact log ID number and Name and then open Amazon connect and select that Contact flow you wish it to apply to.
This will usually take the form of adding a Set Contact Attribute block into the required flow and specifying the user attribute assigned to contact logs with the contact log ID as the value.
However you should contact SmartAgent team if you need assistance in applying these changes to your existing flows if you aren’t sure of the best location to place this element.