Adding / Amending Status codes
The 2 default status values are:
- Available - this means that inbound contacts can be routed to them
- Offline - this is the default status that is set against an agent when they first log in or out
In addition to the above, custom status values can also be added so you can track the activity of your agents during their shifts.
To view, edit and delete agent status values, select Users from the side menu then Agent status.
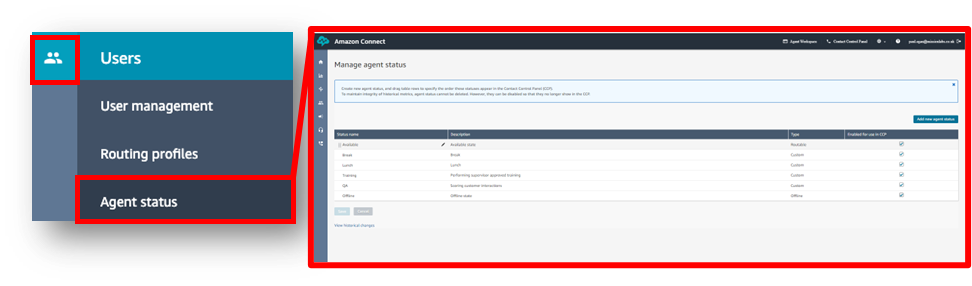
From here you can add a new status, edit existing values, disable a status and also re-order them. Agent Status codes can’t be deleted as they may have data associated with them, however Status codes can be Disabled for use by unticking the “enabled for use in CCP” box. This means Agents will no longer see them.
Click the Add new agent status button and a blank row is added to the top of the page.
Enter a name and description and click Save.
Values can be re-ordered by hovering over the row and dragging the icon displayed to the left of the row. The order is then reflected with SmartAgent and Amazon Connect.
If you no longer need to use a status, then uncheck the Enabled for use in CCP option.
Finally, click Save when you’ve made all your changes.
Within SmartAgent you can configure the Status codes with an expected time value. This will mean that if a time value has over-run the time status will appear in red on Supervisors Realtime Metrics screen, highlighting that an Agents break has over-run for example.
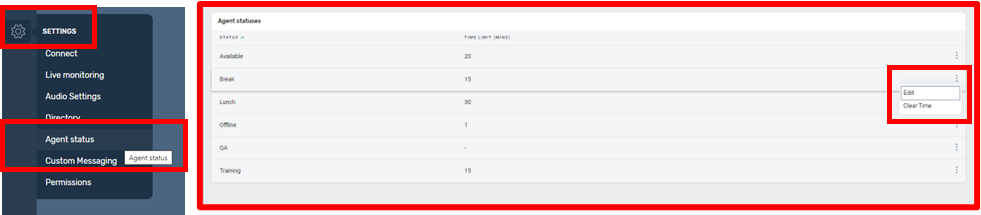
If you go to Settings Menu and select Agent Status you will see a list of all currently enabled status codes. If no time has been set click into the status code and enter a time value in Minutes.
You can edit or clear these values by clicking on the three dots on the right of the status code.